The DIY House Build - Pt 1
In August 2023 our building permit was approved and we immediately started excavation. 4GK Construction handled the foundation and framing so this stage was mostly hands off for me other than scheduling the plumber and electrician for their rough ins and stopping by every few days to check up on things.
After things were excavated, the forms and rebar for the footings were prepared and the footings were poured. Following this, the forms for the foundation walls were put up and the foundation walls were poured.
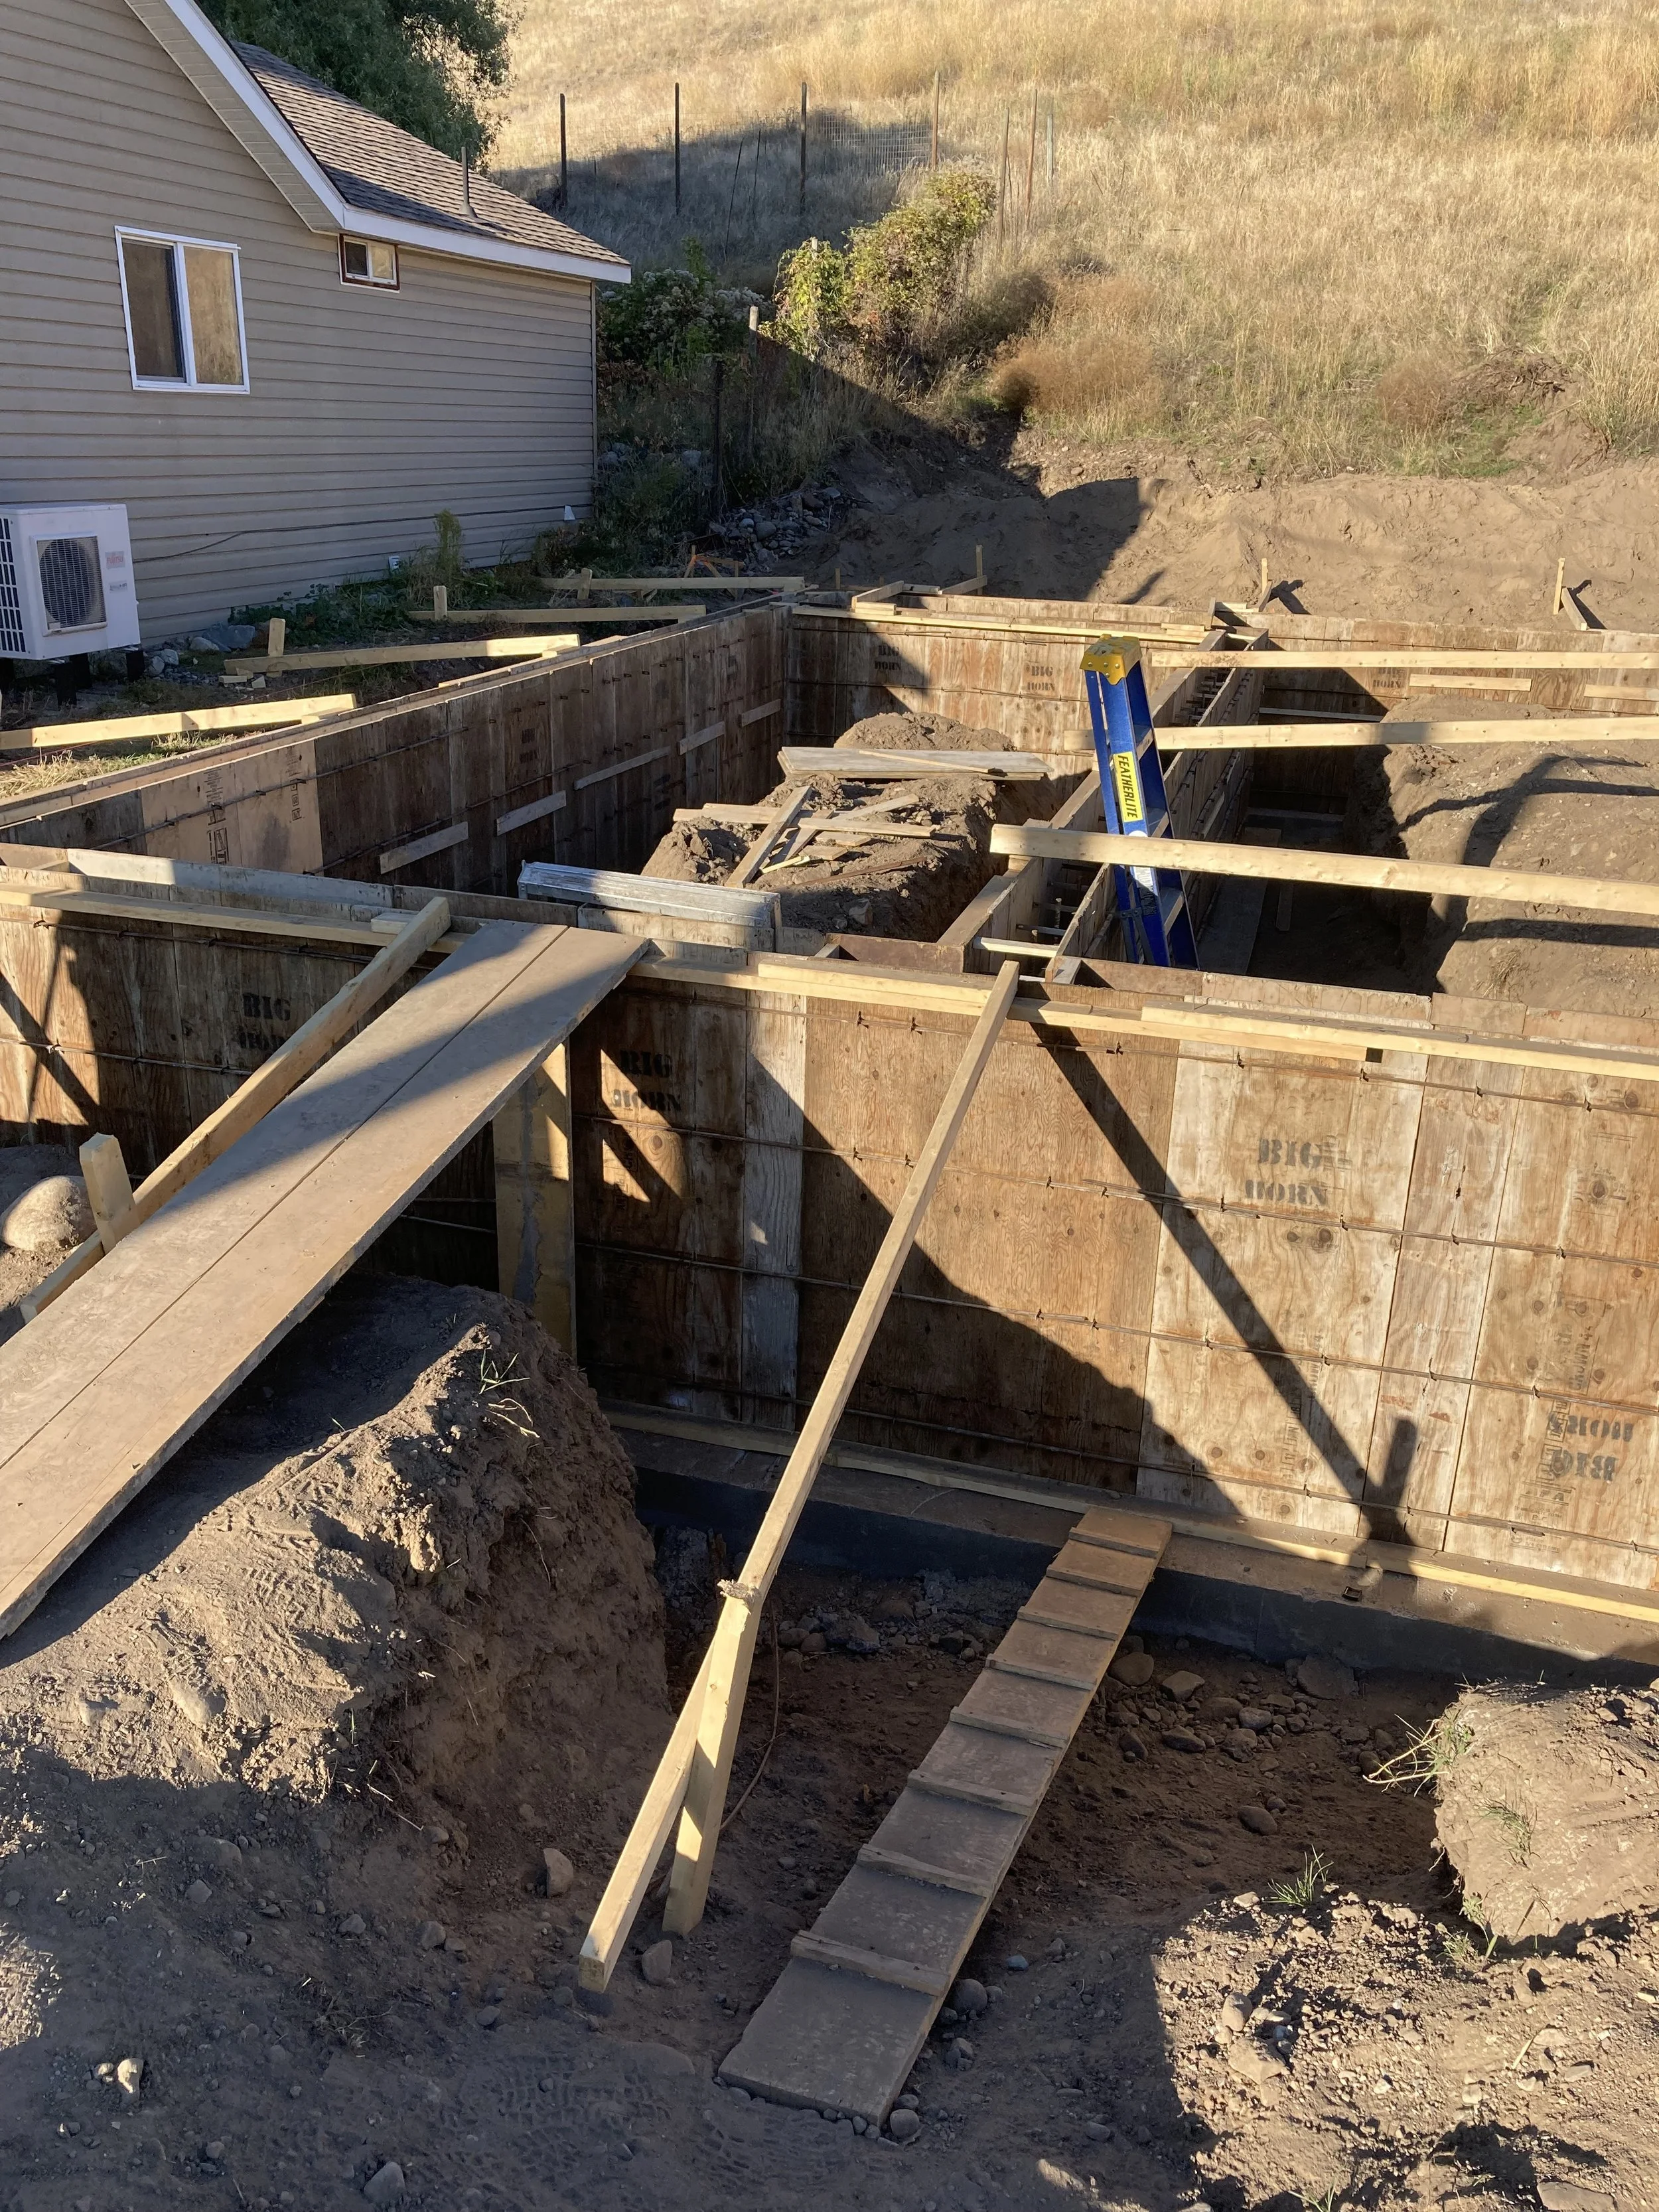
From here things got back filled and then the prep work was done for the foundation followed by pouring the foundation which then cured for a few weeks before framing could start.

Over the next 2 months or so the house was framed. My role during this time was mainly planning ahead and making sure our contractors had necessary details like where our appliances would be for blocking, electrical, and plumbing.


The first thing we really did ourselves in the house was installing some attic baffles which stop insulation from falling out the side and maintain an air gap for venting the attic. Along with framing, the exterior doors and windows were installed.

Our first major task was the HVAC. Both the ducting for the HRV and the lines for the mini splits. This is generally not something most people would attempt to DIY but with enough research it’s not too difficult to design and install a system. As far as designing the system goes, I already had to learn a significant part of it for the owner builder process and for designing systems for studios so it was mainly a matter of calculating the required airflow for each room based on code requirements and best practices.
Our system cost around $7000 and the quotes we got from HVAC companies were around $40,000 so there were significant savings by doing it ourselves. If something ever breaks in the future, it’ll likely be cheaper to entirely replace a mini split compared to getting a tech out here.
The HRV provides fresh air into the house and also serves as the exhaust fan in the bathroom to prevent excess humidity. The airflow is very low compared to a regular ducted HVAC system (furnace) so the ducting required is much smaller. The mini splits then provide the heating/cooling around the house without any ducting.
The house was originally designed to have no chases but due to not being able to run ducting and plumbing on exterior walls plus some changes made to how the house was framed, most of the ducting for the HRV was run through chases. There’s very little ducting since everything sits around the mechanical room so the only lines that had to go beyond that were for the studio.
There aren’t many great resources for installing ducting (since it’s not very common to DIY…) so we didn’t know exactly what we were doing and the various parts and adapters we needed but we managed to get it installed.


Originally the HRV was placed directly under the supply for the bedroom such that where was only around 6” of ducting connecting them. Unfortunately that let a ton of noise into the bedroom (sounded like you were in an airplane). It was significantly louder than standing in front of the HRV in the mechanical room. We ultimately moved the HRV to the far end of the mechanical room and that entirely fixed the issue such that you need to stick your head by the vent to hear anything.
As part of designing the house, I had to hire an HVAC specialist to figure out the amount of heating and cooling the house requires. Through their modelling they came up with 18K BTU which is quite modest for an entire house. We ended up installing 2 completely separate 18K BTU mini splits. This both gives us 4 indoor units so have temperature control in separate areas of the house and once one of them inevitably fails, we’re still theoretically able to adequately heat/cool our house until we replace the unit. We very rarely use all 4 units. For several months of the year we have them completely off and most of the rest of the time we only have 2 indoor heads running.
The biggest challenge I didn’t foresee was installing the lines for the mini splits. Most of the time it’s very straightforward where you simply drill a hole through an exterior wall and run the lines through. In our case, some of the units had to be mounted on interior walls and even for the ones on exterior walls, I wanted to run the lines inside the walls rather than outside along the exterior walls where you’d be able to see them running around the house.
I though it would be relatively straightforward but getting the lines through the house wasn’t easy as they can’t have sharp bends otherwise the copper tubing collapses so very bend needs to be done with a tube bending tool and it can’t go around any sharp corners. It took us several days but we eventually managed to get the lines through.
One problem I wasn’t aware of was the drain lines which take condensation from the indoor heads and let them drip outside. Unfortunately we simply had no room through our structure to have enough slope for the water to drain through the lines properly. Once the mini splits were installed many months later, the lines weren’t draining properly so we had to open up some of the ceiling to reposition the drain lines. It may well be a problem again in the future so we ended up putting an access panel there instead of patching the drywall.

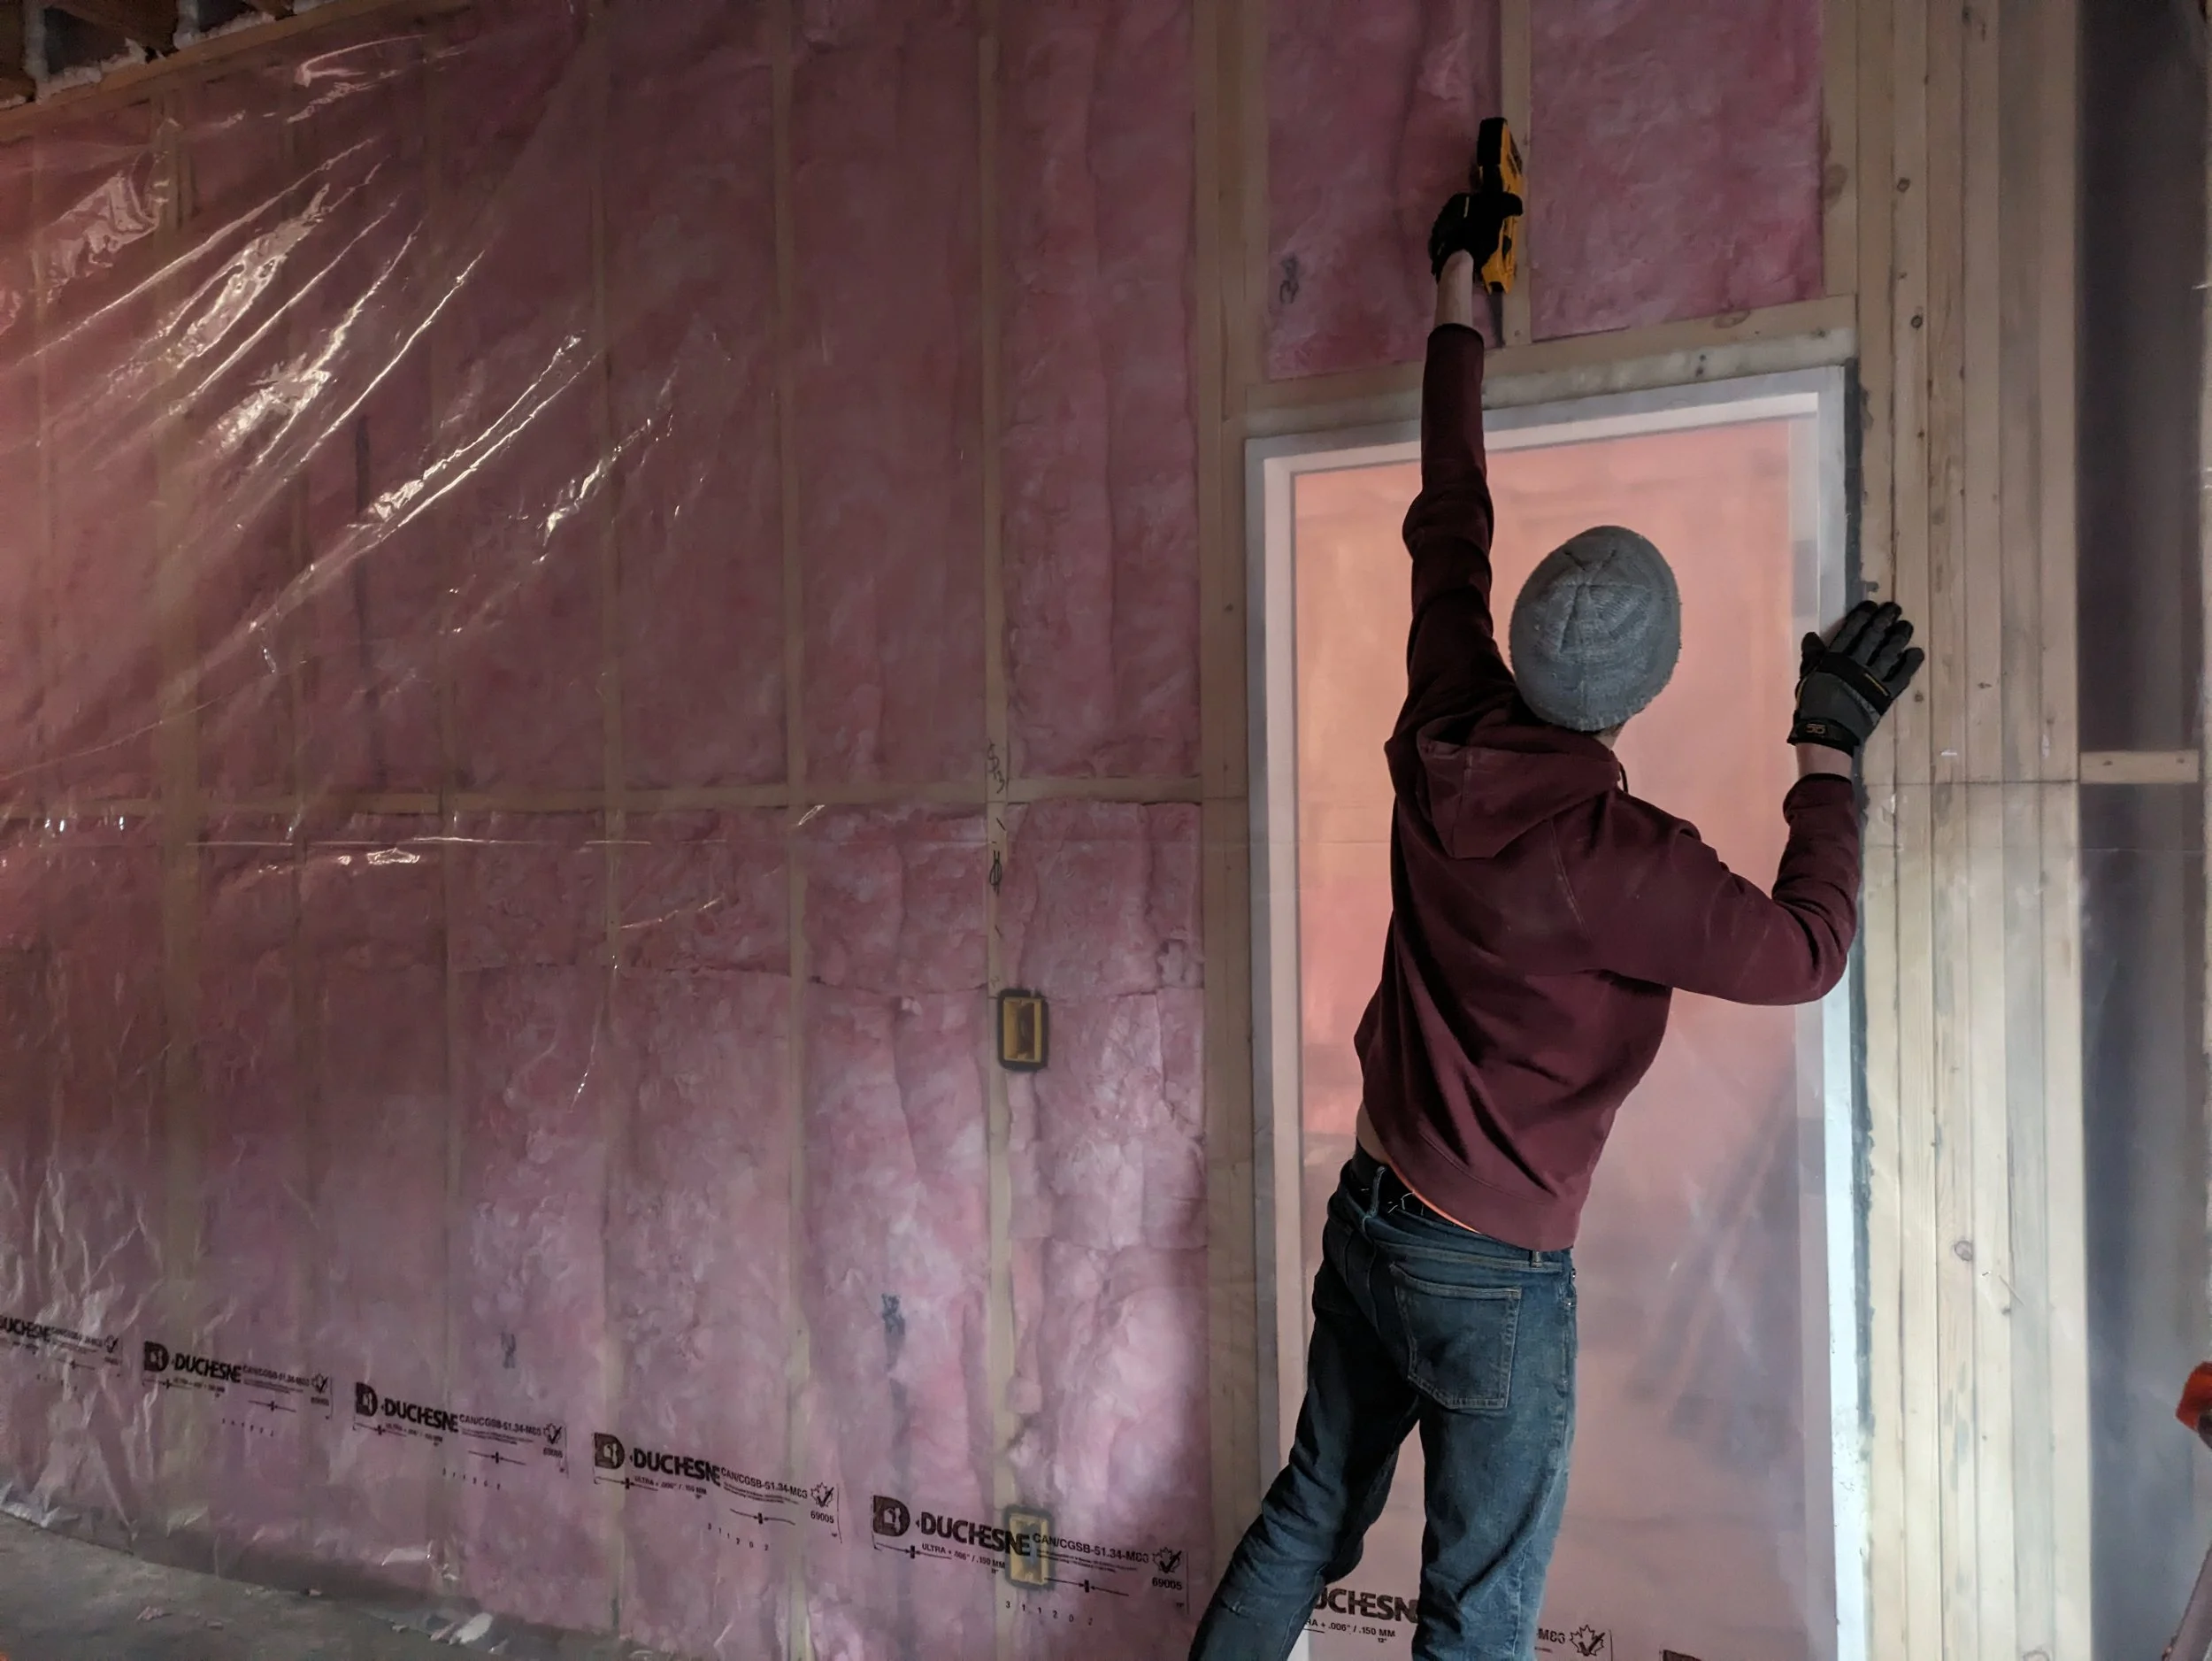
At this point we passed our framing and rough in inspections and were ready for insulating the house. Meanwhile we had contractors working on the exterior elements like the siding and roofing. There task were far more work than we’d be able to take on ourselves and I didn’t want to be responsible for weatherproofing the house. We spent the next few weeks insulating the house. It was the middle of winter and with having insulation in the house, we could start running heaters.


The insulation was all pretty standard although the walls in the studio ended up needing to be R40 due to the entire wall having to be filled with insulation for fire blocking. This is one of the reasons we unintentionally ended up at step 4 for the step code. We also upgraded the ceiling in the garage to R40 instead of the R30 specified in the plans. We insulated all of the walls around the garage (not required by code) so the garage stays relatively warm in the winter and cool in the summer making it easy to work in there and providing a thermal buffer for the rest of the house. The interior walls were filled with rockwool which was a worthwhile investment. The bedroom and bathroom ended up being very quiet thanks to that.
Next up was the vapor barrier. Thankfully our framers had put some poly in the framing where necessary so putting up the poly was relatively straightforward. Getting covered in acoustic sealant (black tar-y stuff) from sealing all of the doors, windows, and electrical boxes wasn’t fun.
Next up was putting up OSB and asphalt roofing in the studio which you can find out more about in the studio build video series.

We were now onto drywall which became a never ending task that took us almost 3 months to complete. Originally I was going to hire drywallers but with things getting increasingly over budget and drywallers costing a fortune, we decided to do it ourselves. The first hurdle was the drywall delivery and carrying it all into the house. The studio uses a heavier drywall we had to specially order which weights around 80 lb per sheet plus the studio has 2 layers of this so it was total of 280 sheets of drywall.

Hanging the sheets wasn’t too bad other than the heavy ones in the studio. Especially putting those up on the ceiling where our drywall lift was too short so we had to build a platform which we had to drag around the studio plus moving around the scaffold.

After hanging all of the drywall it was time for tapping, mudding, and sanding. Many weeks spent being covered in drywall dust and countless trips to the hardware store buying all the mud they had in stock. While the work was pretty straight forward, one of the things I didn’t know (not shown on the DIY resources) is that professional crews use specialized tools which make it much faster than doing it all by hand.
Most of the house ended up looking good but there are some spots with pretty bad joints you can see when the sunlight hits it at just the right angle. We could do a much better job next time although I wouldn’t want to drywall an entire house again.

Between hanging and finishing drywall we had our other most miserable time which was polishing the concrete floor downstairs. Thankfully our concrete finishers left a very smooth finish when the slabs were poured so there wasn’t much polishing needed. I wanted to rent a diamond floor polisher but unfortunately nowhere around here rented them so I decided to try doing it with a 6” disk sander and some diamond polishing pads. It worked to some extent but was pretty slow.
The plan was to use a concrete densifier followed by a sealer. These get sprayed and rolled onto the concrete. I diligently followed the manufacturer’s instructions for the concrete densifier but as I soon learned, I should’ve completely ignored their instructions. With our concrete already being very smooth, it absorbed next to no densifier so it just sat on top of the concrete and dried out into extremely hard blue crystals which the sander could barely sand and looked terrible.
Countless days of sanding the concrete floor with my little sander, then scrubbing and moping the concrete to get the sanded sludge off, and waiting an hour for it to dry with fans running to see how much blue was left. I probably had to sand the floors 10 times to get most of the blue crystals off. Applying the sealer at the end was no problem. I have no problem sealing concrete but polishing concrete is not something I’ll ever attempt again. Leave that to the pros. It didn’t turn out as nice as I would’ve liked it to and I would’ve preferred a “wet look” sealer but it works and cost a fraction of the cost of installing other flooring. Plus it’s pretty indestructible which is necessary since I’m often moving gear around in the room and our hallway gets lots of abuse from walking in an out of the house.

At this point we were at the end of June 2024 and working towards our final inspection to get the occupancy permit. In the next blog post we’ll move onto building all of the cabinets and other furniture, painting the house, and starting the finish work with flooring, and tiling, and finishing off the HVAC install.